
Virtualization is an ideal way of running multiple operating systems on the same hardware, sharing resources, and maintaining security through separation—building walls is good, sometimes. But unlike in the 1960s, when this technology was pioneered, you don’t need a room-sized mountain of tech anymore; even the most entry level processors can happily churn out a bit of multi-machine virtual loving.
We imagine that almost every Maximum PC reader is packing a lean, mean virtualization machine at the heart of their mighty, throbbing computing rig. Toss in the right open source software, and—boom!—you are ready to fire up everything from a Windows 10 clone, handy Android device, or dedicated gaming server to a classic-compatible Windows 3.1 PC. So, rev up those cores, we’re going virtual machine racing.
You’ve probably already heard of VirtualBox—it’s the best known virtualization software out there, alongside VMware and perhaps Xen, KVM, and Hyper-V. The truth is, VirtualBox is just one of many virtualization methods, but being open source, easy to use, and over 11 years old, it’s been propelled to the fore over paid-for proprietary options such as VMware or Microsoft’s Hyper-V.
Once you’ve got your real Windows install just right, the last thing you want to do is mess things up installing dirty software on it. VirtualBox enables you to try out software, run random services, and even share your system with so-called “loved” ones, who just want to take advantage of your fancy rig.
VirtualBox is regularly updated, and you can grab the latest release from here. At the time of writing, v5.2.8 was out, loud and proud. So, we’re going to take a deep dive into setting up, using, and configuring VirtualBox, and the neat tricks you can use to access and use your VirtualBoxes.
1. VirtualBox
VirtualBox helps you build a virtual wall, keeping all invaders safely trapped, running inside a seemingly happy real system of their own. Once you’ve installed and fired up VirtualBox, let’s get some lingo down. Your real PC running VirtualBox is called the host; VirtualBox is technically the hypervisor; and any virtualized systems it runs on the host PC are called guests, and are your virtual machines (VM).
If you haven’t done so already, start VirtualBox. The main “Machine Tools” interface displays all your created virtual machines. Click the top-right “Global Tools” button to list all the created virtual media drives, which are the virtual drives you create to store your virtual machines’ OSes and data. Technically, these are reusable and portable, plus you have snapshot and history capabilities, hence the separate manager.
The biggest gaming news, reviews and hardware deals
Keep up to date with the most important stories and the best deals, as picked by the PC Gamer team.
Before we create anything, though, consider where your VMs will be stored—both the small VM configuration (.vbox) files, and the potentially large virtual media drives (.vdi), and their snapshots. If you’re running a smaller SSD boot drive, you’ll likely want to tell VirtualBox to store these on a data drive. A basic Windows 10 image can happily hit 20GB, and if you end up playing with a few VMs, each could easily be 4GB. Specify a new location by selecting “File > Preferences > General Default Machine Folder location.” While you’re here, you might want to adjust “Update settings” to check once a month rather than daily.
2. Create a virtual machine
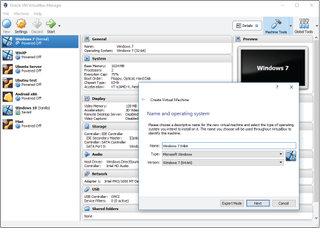
Click the “New” button top-left, or through the “Machine > New” menu. This launches a dialog that steps you through the creation of a new VM. We’ll go through this, pointing out some of the finer points to keep an eye on. Off the bat, you need a unique name for your VM—you can’t have two VMs called “Windows.” It’s also semi-intelligent when you select a “type,” in that it selects some default settings, such as memory capacity, based on what it knows is needed.
The “32-bit/64-bit” setting here is important. A 64-bit host can run both 32-bit and 64-bit guests; 32-bit hosts (which aren’t the best idea anyway) are limited to 32-bit guests. You also need to ensure the install media (we’ll come to this shortly; usually a DVD ISO image) needs to match—so, a 64-bit ISO image for a 64-bit guest—otherwise the installer is likely to error at some point.
3. Assign memory
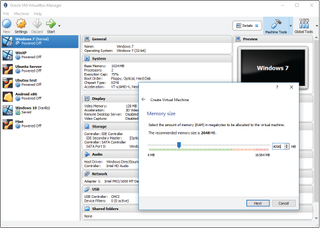
VirtualBox wants to know how much memory to assign to the VM. You can’t allocate more than the host machine, but if you can, 4GB for a Windows Vista, 7, 8, or 10 guest is advisable. Next is the virtual hard drive. You can reuse an existing image with the bottom option, but we’re assuming this is your first run, so select “Create a virtual disc now,” then click “Create.”
4. Expert settings
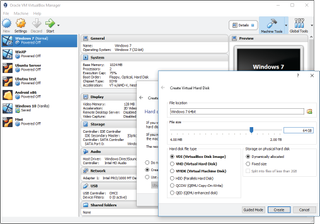
Click the “Expert” button, and you can edit all the options at once. The default settings should be adequate. The file type can be changed if you need to move it to another hypervisor. Fixed size drive images offer minor speed increases, but with obvious storage implications. With a Dynamic allocated drive, you can happily increase the upper file size without penalty, because it starts off sub-20MB in real size terms. Finally, you can click the yellow folder icon to check the storage location.
At this point, the VM is created, and you can start it, but we haven’t allocated any boot media yet, so it won’t get very far. Click “Settings” to discover the full capabilities—we’ll go through the highlights in turn. Under “General > Advanced,” switch “Shared Clipboard” and “Drag’n’Drop” to “Bidirectional.” Once a guest operating system is up and running, you’ll be able to install a pack called Guest Additions, part of which offers up the ability to drop files in and out of the guest, plus share the clipboard.
5. More settings
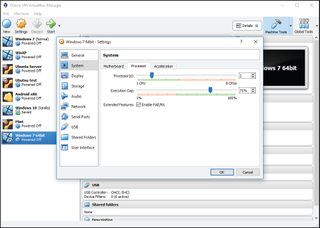
The “System” section controls vital motherboard-level and memory settings. “Chipset” should be set to “ICH9” when using Vista or more recent versions of Windows, because it supports PCI Express and modern interrupts—as a matter of interest, it supports up to 30 network adapters. Ensure “I/O APIC” is selected for virtual multi-core support.
The “Processor” tab enables you to set the number of virtual cores and utilization cap. “PAE” is a processor feature for 32-bit processors to extend memory support beyond the 4GB limit. Some operating systems (Ubuntu, for example) require this to be enabled.
6. Display settings
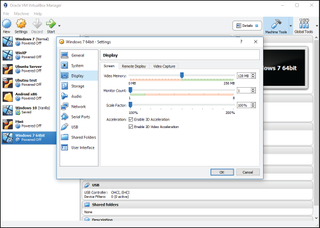
Display settings have advanced nicely in VirtualBox. Memory is allocated from the host’s system memory; typically, 128MB is a reasonable amount. Multiple virtual displays are supported, while 2D and 3D acceleration are possible via Guest Additions, which we’ll cover shortly. Remote Display is a handy feature enabling Remote Desktop access—we cover this in depth toward the end of the feature.
7. Storage
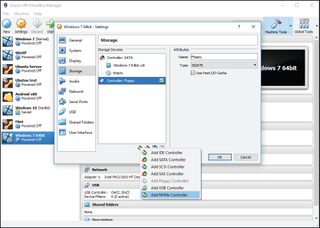
Storage is important in VirtualBox. We won’t go into snapshot management here, just the device settings. VirtualBox should use a SATA controller by default; there is IDE support for older OSes, plus SCSI, too. Booting for USB and NVMe devices requires EFI support under “System” to be enabled. It’s not recommended that you enable the “Use Host I/O Cache” on a VM’s drive controllers; VirtualBox has its own file system cache—a host system can end up allocating a lot of resources to caching a VM’s read/write activities. It’s also possible to limit individual drive bandwidth, but only via the command line, which is beyond this feature’s scope.
Attaching your boot media can be done here. These days, if you fire up a VM without any boot media, VirtualBox asks you whether you want to select an image. Typically, this is an ISO file image—you select the optical drive icon, click the top-right optical disc image, and locate your ISO file. If you were doing this for a legacy OS using floppy drives, you’d do the same, but select the floppy image for the floppy controller.
We’ll skip the “Audio” and “Serial” settings. Audio is largely there to be disabled if required, and if you need a serial port, you really should know what you’re doing.
8. Networking
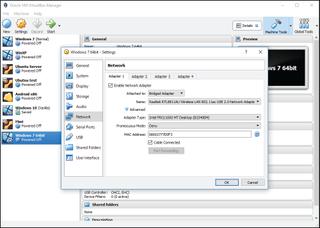
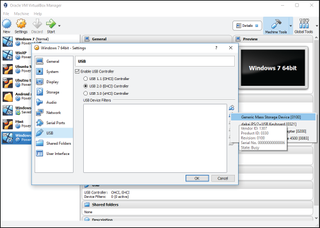
You can skip past “Networking,” too (and it’ll work perfectly)—the capabilities here are powerful, but way beyond what the average home user needs. At the most, if you want to run a network service, select “Bridged Adapter” in the “Attached to” pull-down. This ensures your VM gets its own IP address from your local router. VirtualBox has full USB support, but it needs to be configured for it to identify host-inserted or even remote-inserted (when using Remote Desktop Protocol) USB devices.
You have two options under the USB section: Use the green plus “+” icon to add a currently connected physical device to the filter list, or use the blue dot icon to create a general filter rule, including support for remote accessed devices.
Continue on to the next page for more VM goodness.
Most Popular


