Ultimate BIOS Guide: Every Setting Decrypted and Explained!
Password Check: If you set a password, you can instruct your BIOS to ask for it either when booting the PC or when attempting to enter the BIOS.
HDD S.M.A.R.T. Monitor: Short for Smart Monitoring Analysis and Reporting Technology, this serves as a preventative diagnostic to help predict imminent hard drive failures. When enabled, supported hard drives will report any problems that could ultimately lead to outright failures.
Limit CPUID Max. to 3: The only ones who should have this setting enabled are those running a legacy OS with a Pentium 4 processor or higher. CPUID instructions are used to identify the type of processor installed, and the higher the number, the more information can be obtained and written to. Operating systems released before the Pentium 4 had trouble handling the additional CPUID parameters, which is where this limit comes into play. Vista, XP, and Windows 7 users can safely leave this option Enabled.
No-Execute Memory Protect: This safeguard prevents buffer overflow attacks and both AMD and Intel support this feature, it's just labeled differently. When enabled, certain areas of memory will be marked as non-executable, preventing the processor from executing potentially dangerous code in those areas.
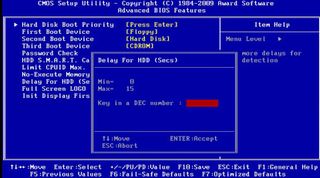
Delay For HDD (Secs): Also known as a Hard Disk Pre-Delay, this feature mostly applies to older IDE hard drives. In some cases, older, slower HDDs were incapable of spinning up in time to be intialized, rendering them undectable. To resolve this, motherboard makers introduced a way for users to manually force a delay before this happens.
You only have a few seconds before the Splash screen disappears, and at that point, you can no longer get into the BIOS unless you reboot and try again. Alternately, you can usually whisk the Splash screen away by hitting the TAB key, which will then display the standard POST screen.
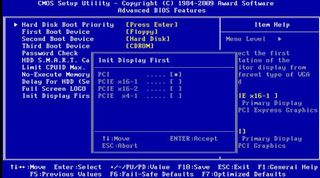
Init Display First: In ancient times somewhere around the year 9 BT (Before Twitter), gamer's evolved from using PCI-based videocards to those built for the then-emerging AGP standard. This setting allowed users to tell their systems which type of card they were using, and if improperly configured, could lead to a blank screen. This was mainly relevant when running two types of videocards in the same machine.
The biggest gaming news, reviews and hardware deals
Keep up to date with the most important stories and the best deals, as picked by the PC Gamer team.
Today's gamers get their groove on with PCI-Express based videocards, or at least the serious ones do (it's going to be fun looking back at this comment a decade from now). Most modern motherboards give you the option of selecting PEG, which is your PCI-Express graphics port, or PCI. The latter comes in handy when troubleshooting a potentially bad videocard by sticking a PCI card in your system. If it's not automatically detected, change this setting to PCI.
Integrated Peripherals
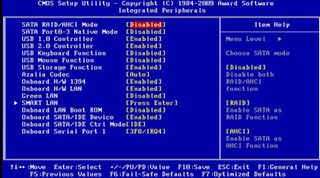
Every motherboard comes with at least a handful of functionality embedded into the board itself. When installing a third party peripheral -- like a Creative X-Fi soundcard -- your first order of business should be to the disable your motherboard's onboard equivalent to prevent any conflicts, and this is the section where you'll find those options.
The other school of thought here is that by disabling unused peripherals and ports, you can recover additional resources for improved performance. And for a time, this might have been true. However, now that 2GB and over has become the standard, you're not likely to gain any significant advantages by disabling unused LAN and other dormant ports, but you do run the risk of forgetting you disabled a previously unused port in the BIOS, making you think you have a bad mobo. Keep that in mind before you go disabling everything in sight.
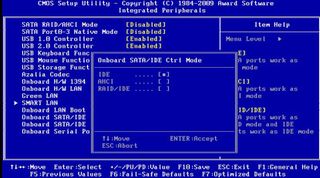
SATA RAID/AHCI Mode: You might not always find this setting under Integrated Peripherals, depending on the layout of your BIOS. It might also be labeled slightly differently, but the options are the same. Here are your three possible choices.
IDE: Often times the default option, this sets up your system so that your SATA drives run in IDE mode (see below).
SATA Port 0-3 Native Mode: The most common solution, configuring SATA drives in native IDE mode is also the easiest, as it sports the most compatibility and a 'driver-less' install, at least in terms of not needing to go through the F6 dance. Disabling this option puts the SATA ports in Legacy IDE mode, which is used for pre-XP OSes like Win 9x/ME
USB 1.0 Controller: We don't know why anyone would choose to disable their motherboard's onboard USB controllers, but this would be the place to do it.
USB 2.0 Controller: Also known as EHCI, or Enhanced Host Controller Interface, you'll need to enable this setting to take full advantage of your motherboard's USB 2.0 ports and high-speed USB devices.
USB Keyboard Function: If you don't have this option enabled, it will be difficult (read: impossible) to get into your motherboard's BIOS without a legacy PS/2 keyboard.
USB Mouse Function: Enables USB mouse support for use with OSes that don't support it natively.
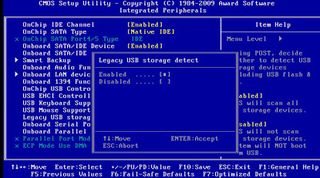
Legacy USB Storage Detect: Some very old OSes -- like DOS -- don't play nice with USB storage devices. Enabling this setting can help through emulation.
Azalia Codec: Several onboard audio solutions exist and depending on which one your motherboard manufacture has chosen, so finding this setting might be obvious (Onboard Audio) or a bit obscure (Azalia Codec, AC97). Enable this if you plan to use the included audio chip, and disable this setting if you plan to get your groove on with a discrete soundcard, such as Creative's X-Fi series or Asus' Xonar, to name just a couple.
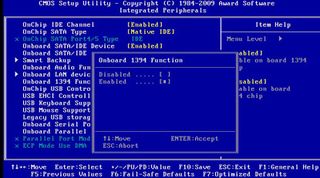
Onboard H/W 1394: Refers to your motherboard's Firewire port(s).
Onboard H/W LAN: Depending on how many LAN ports your motherboard comes with, you may see one or several different entries (LAN1, LAN2, etc). Keep these enabled if you plan to do any kind of wired networking, including connecting your PC to a DSL or cable modem.
Green LAN: A power saving feature, enabling this option tells your motherboard to disable the network socket and onboard LAN chip when it doesn't detect a connection.
SMART LAN: This performs a diagnostic on your motherboard's integrated LAN ports.
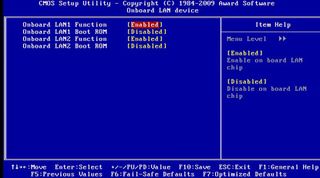
Onboard LAN Boot ROM: Contrary to what you might have guessed, this setting doesn't refer to booting your PC remotely via the LAN port. Instead, this is intended for newer Gigabit LAN ports to operate at their full 1Gbps speed when using an older OS by loading the LAN controller's boot ROM during boot.

Onboard SATA/IDE Device: Enables your motherboard's SATA ports. Go figure!
Onboard SATA/IDE Ctrl Mode: This is where you'll tell your motherboard to operate its SATA ports in IDE, AHCI, or RAID mode, as outlined above (see SATA RAID/AHCI Mode).
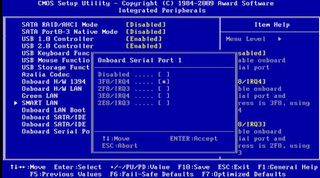
Onboard Serial Port: This setting allocates an address and IRQ for your motherboard's serial port. Unless you're experiencing any IRQ conflicts, you should leave this setting on Auto (if it's an option), or however it comes configured by default (typically 3F8/IRQ4). If you don't plan on using the serial port, you can safely disable this setting, freeing up an IRQ in the process.
Onboard Parallel Port: Same as above, use this setting to configure your parallel port, otherwise known as LPT1. Or better yet, retire that crusty dot matrix printer and finally make the jump to a USB-based inkjet printer and never bother with a parallel port again.
Parallel Port Mode: Settings here include SPP (Standard Parallel Port), EPP (Enhanced Parallel Port), and ECP (Extended Capabilities Port). EPP adds bi-directional communications support between the PC and connected devices, resulting in faster transfers and lower CPU usage. ECP supports even faster transfers and is useful for daisy-chaining multiple parallel port devices.
Most Popular


