The Division 2 endgame and World Tier 5 guide: what to do when you reach level 30
Survive The Division 2's endgame and climb the World Tiers with our guide, now updated with World Tier 5 tips.

One of the biggest complaints of The Division was its endgame, or lack thereof. A few more difficult missions, the Dark Zone, Underground and Last Stand were just about it. With that in mind, it feels like The Division 2 is slightly overcompensating, because its endgame is almost overwhelming in its scale.
Even beginning to navigate your way through the new and dangerous DC level 30 brings you can be tricky, and so here is a primer on everything you need to know about The Division 2’s endgame. We've updated this guide as of World Tier 5,

The Division 2 Review
The Division 2 settings and performance
The Division 2 fast leveling guide
The Division 2 solo player guide
The Division 2 specializations guide
The Division 2 crafting guide
The Division 2 perks guide
The Division 2 gear sets guide
The Division 2 endgame and World Tier 5 guide
How to reach The Division 2's endgame
The Division 2 has a level cap of 30, which you should hit by the time you’ve finished all the missions and a few of the extra activities dotted around the map. If you’re still in the levelling phase, check out our guide on how to make that process fly by.
Once you finally hit level 30, you may be slightly underwhelmed by what becomes available to you at first. The map will look almost identical to before, with only two key differences: a new Stronghold on the east of the map will become unlocked, and one of the three Dark Zones will have gear normalisation disabled (you can read all about what this means in our Dark Zone guide).

These things are just the preamble to the true endgame, and to access that, you’ll have to have completed all three of the faction Stronghold missions. These are lengthy and difficult missions with absurd amounts of enemies and so, unless you’re a glutton for punishment, teaming up with other players is a must.
There is a recommended order for tackling the Strongholds, as two of them have already been unlocked. District Union Arena and Roosevelt Island are both beatable before you hit the level cap. The game recommends you do District Union Arena first, however, Roosevelt Island is shorter and slightly easier, despite its higher-level requirement. You may want to tackle that one first instead to get a feel for how Strongholds work. Regardless, you’ll always want to leave the Capitol Building Stronghold, which isn’t unlocked until Level 30, for last.
Once you’ve beaten all three, you’ll be transferred to World Tier 1 (more on that below), a cutscene will play, and all that effort you’ve put into saving DC is thrown straight out of the window. The Black Tusks have moved into the city, and this is where the real endgame begins.
The biggest gaming news, reviews and hardware deals
Keep up to date with the most important stories and the best deals, as picked by the PC Gamer team.
How to increase your Gear Score in The Division 2's endgame
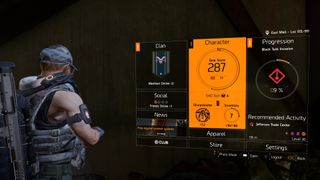
Gear Score is The Division’s version of Destiny 2’s Power level. Once you’re in the end-game, each gear piece, weapon, and mod is assigned a number that contributes to your character’s overall gear score and is used for both a measure of your overall combat power and as a progression barrier. The first World Tier is capped to 300, the second to 350, the third at 400, the fourth at 450, and the fifth at 500.
Gear Score is calculated in two different ways. First, the score given to your character is worked out from what you currently have equipped. This means you’ll want to equip the gear with the highest score possible, even if it means taking a slight hit to your stats, just to ensure you progress through the tiers as quickly as possible.
Secondly, gear score also dictates the score for loot that is dropped. This is not taken from your currently equipped score, but instead by the highest possible score from your inventory and your stash. Unlike your character’s gear score, the loot table’s score will only increase, and deconstructing or selling your highest-scoring gear (while maybe not the best idea) will never pull the score of your loot drops down.


The Division 2 hyena key locations guide
The Division 2 Dark Zone key guide
The Division 2 masks locations guide
The Division 2 Liberty exotic pistol guide
The Division 2 Chatterbox exotic SMG guide
The Division 2 Sweet Dreams exotic guide
The Division 2 Pestilence exotic LMG guide
The Division 2 Merciless exotic rifle guide
The Division 2 Nemesis exotic rifle guide
The absolute best way of increasing your gear score is through crafting. Make sure to read out guide on how crafting works in The Division 2 for the basics, but in the endgame, you must remember to upgrade your bench for each new world tier you transition to. This allows anything you craft to drop with the highest possible score and provide the maximum benefit. If you’ve been saving your crafting materials from the levelling phase, this is the time to put them to good use.
Also make sure you visit the vendors scattered around the map, as often their wares have a few pieces that can be used to push up your gear score. It’s not as effective as crafting, but it doesn’t take much effort to check, and you can always sell off your older stuff for some extra funds for crafting while you’re at it.
Because your progression in the endgame is based on gear score and not levels, this is the first time in the entire game where PvP can be incredibly beneficial. Increasing your gear score depends on getting as much of the highest-rated loot possible, and, conveniently, Conflict and the Dark Zone are great sources of it. Spend 10 minutes playing a round of Conflict and win, and you could be rewarded with multiple caches that each give gear that pushes your score way up.
Despite Gear Score being the sole method of progression after level 30, you’ll still be awarded XP for all the same actions it did for you before. The only thing XP is good for now, though, is unlocking Field Proficiency Caches. These can be excellent sources of powerful gear, money, and materials, although their maximum potential is defined at the time of being awarded by the same calculations that define a loot drop. Open the caches as soon as you get them, otherwise they may quickly grow to be outdated as your gear score increases further.
How to increase World Tier in The Division 2

World Tiers are the endgame’s equivalent of levels. Not only do they define how strong enemies are in the open world, moving to a higher World Tiers also unlocks stronger gear, new crafting blueprints, and harder difficulty settings for missions. As of April 2019, with the Invasion: Battle for DC update, there are five World Tiers.
Progressing through the tiers is simple: complete two specific invaded missions, make sure your gear score is at the required level, and then beat the corresponding Stronghold. Upon completion, you’re on your way to the next tier.
How to reach World Tier 5 in The Division 2

World Tier 5 is the (current) final tier, with a soft gear score cap of 500. Getting to it triggers a whole lot of new content, including new equipment (gear sets are only available at this tier) and some of the most difficult enemies in the entire game. The jump from WT4 to WT5 is about as big as the jump from the levelling game to WT1 in terms of new content and difficulty, and getting to grips with it can be difficult even for endgame veterans.
After completing the Tidal Basin stronghold (and its short preceding mission just south of the White House), the Black Tusk are thrown into disarray and will spread across the map, and will invade just about everything in DC.
Every story mission, including ones that were never invaded before, is now open for the Black Tusk, with different missions and strongholds becoming invaded each week. Fortunately, any currently invaded mission can now also be toggled between Invaded and standard modes, for if you don’t fancy dealing with the Black Tusk right there and then.
Heroic difficulty
Speaking of Difficulty modes, World Tier 5 unlocks Heroic difficulty for certain missions. The absolute hardest challenge in the whole of The Division 2, don’t expect to be able to clear these as soon as you enter the world tier.
Enemies take lots more damage, can down you almost immediately, spawn in far higher numbers, and the missions often don’t have internal checkpoints. This is a step above even the Legendary difficulty found in the first game, with story missions that previously took 15 minutes taking well over an hour to complete for even the most coordinated of teams.
It’s important to note that, while offering rarer loot, nothing is exclusively dropped in Heroic difficulty. Massive has been careful to explain that it’s purely for bragging rights, and not expected of every player. Anything you can get in Heroic can be found elsewhere in the game at lower difficulties.
Invaded Missions and Strongholds

Invaded Missions work similarly to the Legendary edition that was introduced to the first game in its second year. At first glance, they look a lot like nothing more than a higher difficulty option for the missions you’ve already beaten in the levelling phase of the game, but that isn’t wholly accurate.
The only similarity between Invaded Missions and their non-Invaded counterparts are the layouts of the levels themselves. The factions you fought previously have been replaced by Black Tusk forces, which bring with them radically altered enemy placements (rooms that were clear before may be heavily fortified in an Invaded mission), new story beats, and different objectives that make the whole thing a much bigger challenge.
Those Strongholds you’d just cleared to get into the endgame? Yeah, they’ve been invaded by the Black Tusk too. To unlock each of the three Strongholds, you must beat their two corresponding Invaded missions:
- District Union Area: Beat Grand Washington Hotel and Jefferson Trade Center.
- Roosevelt Island: Federal Emergency Bunker and Potomac Event Center.
- Capitol Hill: Air & Space Museum and Space Administration HQ.
Tidal Basin

You may notice there is a fourth Stronghold on your map, south-west of the Washington Monument. Tidal Basin is the final stronghold of the game, where four players fight against the remaining Black Tusk forces to save Washington DC from annihilation.
To gain access to it, you will need to have beaten all three other Strongholds and have a gear score of at least 425. From there, a new, combat-free mission south-east of the White House will activate, setting up the story for why you’re headed into Tidal Basin and why it’s not been available up to now.
Despite being essentially the final mission of the game for many, Tidal Basin isn’t that much more difficult than the other Strongholds. It’s long, explosive, and there are lots of Black Tusk, but an adequately-geared up team should beat it no problem. Once that’s done, you’ll progress to World Tier 5, where a whole new stage of the endgame begins.
Raids
A new addition in the April 5 Invasion: Battle for DC update is the expeditions helicopter found at the White House. This currently doesn’t do anything, but, come April 25, will be where the first eight-player raid, Operation Dark Hours, is accessed from.
Bounties and bosses

The community for the first Division rallied around some of the named bosses that wandered around DC (all hail the Bullet King), so it’s no surprise they’ve come back in a big way for The Division 2. In fact, the number has almost quadrupled from 15 in the first game, to a whopping 52 in the sequel.
Dubbed the Deck of 52, each named boss in the open world drops a collectible playing card, with each of the four factions corresponding with a suit. Unlike the first game, you can’t simply farm on a single boss for loot. Instead, you must complete the entire deck of bosses and gain the reward for doing so before they respawn
Finding the bosses can be tricky, although thanks to the sheer number of them running into a few whilst running from control point to control point isn’t too rare. Still, completing the whole deck is a massive commitment that should keep completionists occupied for quite a while.
Bounties are targets that are assigned to you by an NPC and work slightly differently to the bosses you encounter in free roam. Bounties become available before the endgame by recruiting Otis Sykes to the White House, though higher difficulties and more lucrative targets become available in the endgame.
Once assigned, you have approximately 15 minutes to get to a bounty’s location – once you’re in the area and have engaged the enemy, the timer stops, so feel free to take your time in the actual fight. Kill enough enemies, and the bounty themselves will appear. Take them down like a normal boss, and the bounty is complete. However, if you die, you will fail the bounty and will need to get it reassigned to you before you can go for another try.
Normal bounties cost intel, which is dropped all over the place. The stronger the bounty, the better the reward, the more intel you’ll need to spend to acquire it. There is another NPC that assigns bounties for free, though: The Snitch.

The Snitch is kind of like Destiny’s Xur, in that he’s a travelling NPC that can be found almost anywhere across the map. Some players report he tends to spawn close to safehouses, while others have found him at Unknown Activities (question marks on the map). Either way, finding him assigns to you a lucrative bounty from the Deck of 52, and marks the location of Cassie Mendoza, a travelling merchant with some decent, if expensive, gear.
At the final World Tier (which is currently unavailable), Heroic Bounties will come into play. These will be much, much harder than standard bounties, but will grant much better rewards that can push your gear score up to the max. Other than that, we don’t know too much about the specifics of how Heroic Bounties will work yet.
Control Points
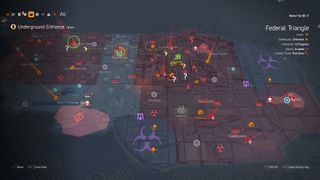
Remember all those control points you meticulously captured while levelling? Well they’re all up for grabs again, as the factions will constantly take them back not too long after you’ve captured one.
This is a double-edged sword. On the one hand, movement around DC becomes a lot more difficult. It’s worth ensuring you’ve unlocked every safehouse before advancing to the endgame, as they, the Theater and the White House are the only places that will reliably remain uncaptured and available for fast travel. Even the Campus isn’t secure, as Black Tusk blockades will routinely be set up near it, preventing access to the settlement until the way has been cleared.
On the other hand, reclaiming a control point will once again grant you access to their supply room. Between that and the drops from killed enemies, they’re a good source of loot and crafting materials. You’ll also be able to refill a control point’s resources at the leader, giving you a boost of XP that can be the push needed to your next Field Proficiency Cache.
Activities
The endgame brings with it some new activities. On top of the usual resource convoys, public executions, territory control, and other activities you’re used to, Elite versions of most of them have also been activated. These tend to be Unknown Activities (again, marked with a question mark on the map), but the rewards they give are much greater than standard ones.
While they make moving through DC a pain, it’s recommended you complete as many of the ones you come across as possible. The experience for Field Provision caches, dropped loot and completion of project requirements makes them more than worth a minor detour.
The Division 2’s endgame can be mindbogglingly complex, even for stalwart Division players. There’s still more on the way, with Specializations (we have a full guide on those), the Operation Dark Hours raid on April 25, and a whole year’s worth of story and content updates yet to come.
At the very least, this guide should get you up to speed and ready to take on whatever Massive throws at us. That is, if you’re not having to recapture all your control points yet again instead.
Most Popular


