How to disable Cortana in Windows 10
Turn off the the Windows assistant in a few easy steps.

Cortana is the digital voice assistant built into Windows 10, designed to make your life easier with simple voice commands. And like Siri for Apple, Alexa for Amazon, and Google’s self-named voice assistant, Cortana can be finicky.
If you're not interested in those voice assistant features, don't want it piping up when you click on the search bar, or you're worried about your privacy, here's how to disable Cortana. Microsoft doesn't make it easy, but we'll walk you through the process.
Before you disable Cortana
When Windows 10 was first released it was simple to switch off Cortana, but doing so broke Windows Search. Turning it off now doesn’t break search in quite the same way, but it can have an impact. It's also not quite as easy as it used to be. Changes were made in the Windows 10 Anniversary Update to how Cortana integrates into Windows and how we can turn it off. Not all previous methods work, but the steps in this guide will.
Cortana is tightly integrated into Windows 10 and Windows Search, so you will lose some Windows functionality if you disable Cortana: personalized news, reminders, and natural language searches through your files. But standard file search will still work just fine. And the good news is that you can reverse this process. If you don’t like what happens when you disable Cortana in Windows 10, just perform the steps again and undo the changes you made.
Before disabling Cortana, create a Windows Restore Point. Always better to be safe than sorry.
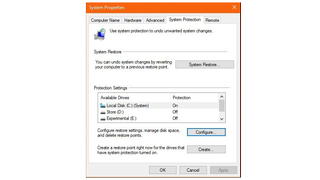
- Type 'system restore' into the Windows search box and select 'Create a restore point.'
- Select Create at the bottom of the popup box that appears.
- Give it a name and select Create.
The process will take a few minutes and will create a snapshot we can use in the unlikely event something goes wrong when disabling Cortana.
How to disable Cortana in Windows 10 Pro and Enterprise
The most effective way to disable Cortana in Windows 10 is to use Group Policy. GPEdit allows us to turn off Cortana with minimal impact and can be done in a couple of minutes. The downside is that Local Group Policy Editor is only available in Windows 10 Pro and Enterprise. You are able to add it to Windows 10 Home, but you can also use the registry editor, which is easier (more on that below). See our guide on the difference between Windows 10 Home and Pro for more on version variations.
The biggest gaming news, reviews and hardware deals
Keep up to date with the most important stories and the best deals, as picked by the PC Gamer team.
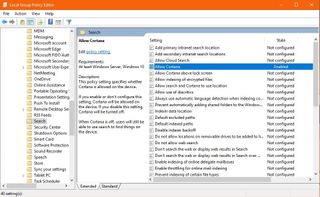
- Type 'group policy' into the Windows search box. You can use Windows key + R and type "gpedit.msc' if you prefer, both will work.
- In the left pane of Local Group Policy Editor, navigate to Computer Configuration, Administrative Templates, Windows Components and Search.
- Select Allow Cortana in the right pane.
- Right click Allow Cortana and select Edit.
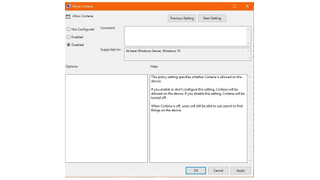
- Select Disabled in the radio button on the left.
- Select Apply and the window will close. You should now see Disabled on the Allow Cortana line rather than Enabled.
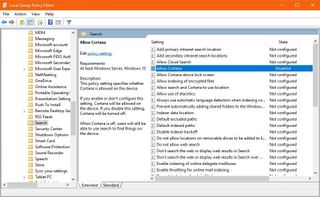
That’s all there is to it. You have now disabled Cortana in Windows 10 using Group Policy Editor. If you want to reinstate Cortana, just repeat the above and select Enable at Step 5.
How to disable Cortana in Windows 10 Home
As Group Policy Editor is not available in Windows 10 Home unless you install it yourself, we need to use the registry to make the change. Thankfully it's just as straightforward.
- Type 'regedit' into the Windows search. You can use Windows key + R and type 'regedit' if you prefer, both will work.
- Navigate to HKEY_LOCAL_MACHINE\SOFTWARE\Policies\Microsoft\Windows\Windows Search in the left pane of regedit.
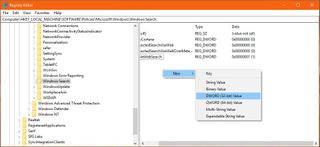
- Right click an empty space in the right pane of regedit and select New and DWORD (32-bit) Value.
- Name it 'AllowCortana' and give it a Value of 0.
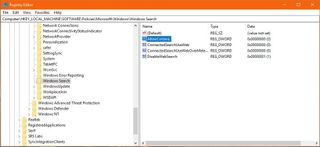
- Select OK to save your new key.
And you're done! Cortana won't bug you anymore—at least, not until a big Windows update conveniently reenables it.
Most Popular


