How to upgrade your shovel and clear wildebeest bones in Disney Dreamlight Valley
You can finally upgrade your shovel to smash some bones

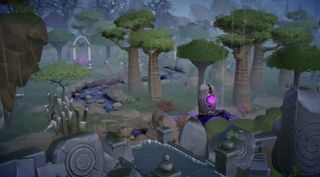
Now that Scar is roaming the Sunlit Plateau in Disney Dreamlight Valley, you'll be able to upgrade your Royal Shovel and finally smash those wildebeest bones lying around. There are two stages to upgrading your shovel and you'll need to complete various tasks for Scar before they unlock. In this guide, I'll talk you through each quest to get you that all-powerful new shovel.
How to upgrade your Royal Shovel
The first quest will help you clear the small bones littering the Sunlit Plateau, before moving on to another upgrade that'll help you clear the large bones blocking the bridge. Needless to say, you'll need to have unlocked Scar and the Sunlit Plateau to access this upgrade.
How to clear small bones
Speak with Scar and he'll ask you to visit Scrooge McDuck, who will give you a mold for the shovel. You'll then need to visit Scar again who'll give you the ingredient list for the shovel upgrade. You'll need to gather:
- Five dry wood
- Five iron ingot
- Five lion's claws
You can get iron ore from the Glade of Trust, Sunlit Plateau, Forest of Valor, Forgotten Lands, and Frosted Heights. You'll need 25 iron ore and five coal to craft the ingots, and dry wood can be found around the Sunlit Plateau, Forgotten Lands, and Frosted Heights.
The lion's claws will be found near the cliff edges in the first section of the Sunlit Plateau. They can be found in glowing digging spots near the cave, the entrance to Forgotten Lands, and in the elephant graveyard. Just keep digging up bright spots until you gather all five.
Once you've collected everything you need, head to a crafting bench and create the shovel upgrade. You can select the upgrade from your regular inventory and apply it to the shovel. Have fun removing all the small bones!


How to clear large bones
Scar will comment that this upgrade only removes the smaller bones and that he's not very pleased about it. Seriously, Scar? This was your idea! So, it's off to speak with Mother Gothel who'll task you with finding some old bones and ten Purified Night Shards. The bones are easy to find: head into the cave in the Sunlit Plateau, take the first left, the next right, and the following left to find them glowing in a pile. A literal pile of bones, that's all you're looking for.
The biggest gaming news, reviews and hardware deals
Keep up to date with the most important stories and the best deals, as picked by the PC Gamer team.
Crafting the Purified Night Shards is going to take a while here. You can find Night Shards by digging up glowing spots all over the valley, removing night thorns, and mining. Once you've got all ten shards, speak to Scar and he'll say that the geyser in his cave can turn the bones to ash, which you conveniently also need for the upgrade. After that, plant the ash and water and tend to them until the Flower of Bones grows, which shouldn't take very long.
Collect the flower and, alongside the Purified Night Shards, craft the Roaring Shovel Head. Open your inventory and apply it to your shovel to complete the upgrade and you'll finally be able to access the other side of the Sunlit Plateau if you haven't moved the fast travel well there already.
The first three games Lauren played on PC were Star Wars: X-Wing, Zoo Tycoon and Barbie Fashion Designer, which explains her love of all things space, strategy and aesthetically pleasing. Lauren recently took over as PC Gamer's Guides Editor after three years of writing many dozens of Destiny 2 guides at VG247, as well as casually trying to shoehorn in The Witcher 3 articles wherever possible. When she's not trying to force everyone to play as a Warlock in Destiny 2, Lauren is either mastering her SEO abilities to help smash the competition, or patting one of her red sons.
Most Popular


